Like the name implies, post-processing is the last step in the render pipeline. It runs after (post) all scene elements are rendered to the scene.
Some common examples of post-processing effects are bloom, depth-of-field, recoloring, etc. These effects are applied on the entire canvas, not just on specific elements in the scene. This means they should be applied to the final rendered 2D image.
The process is very similar to what we covered in the Image Compositing class, but instead of using an image or video frame as our input texture, we will use the scene we are rendering through the camera. We use a shader to render our effect on this input texture, and output the result to an offscreen buffer.
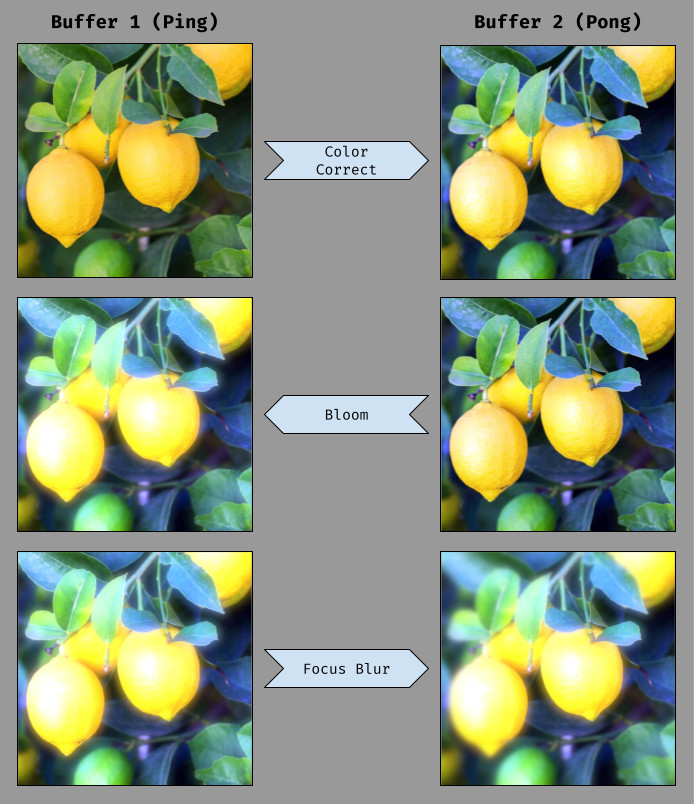
If we want to apply many post-processing effects, we can use two offscreen buffers and render from one to the other, alternating which is the source and which is the destination for every step, or pass. The final step, which consists of all the effects stacked on top of each other, gets rendered to the screen. This process is called ping pong buffering.
Effect Composer
In three.js, we can achieve all this using the EffectComposer. Once it is set up and linked to our renderer, we can add a RenderPass to render our scene using the EffectComposer.
The default RenderPass just copies the buffer data, so our example looks identical as if we were rendering to the screen directly. Let’s add a built-in effect pass that renders the image using dot patterns.
three.js ships with many built-in effects, which can be found in the examples/jsm/postprocessing folder. These effect passes can be stacked in the EffectComposer and will be applied in the order they are added in.
Documentation is unfortunately sparse on these effects, so we will need to look through the code to see which options can be configured.
Exercise
Try stacking a second effect pass in our app. Notice any differences if it’s added before or after the DotScreenPass.
Shader Pass
Next let’s add a kaleidoscope effect pass. three.js has a KaleidoShader object we can try. However, this is a shader and not a render pass, so we will need to wrap it in a ShaderPass to add it to the composer.
three.js ships with many built-in shaders, which can be found in the examples/jsm/shaders folder. If we look at the KaleidoShader.js source, we notice that there are two uniforms we can use to customize the effect. We can edit these by accessing the instance of the shader that is attached to our ShaderPass using the ShaderPass.material property. We can also use the ShaderPass.enabled property to toggle the effect on and off.
Custom Pass
We can also create our own effect by passing a custom shader to the ShaderPass!
The shader needs specific formatting to work correctly:
- It must have a uniform sampler named
tDiffuse. This uniform is how theEffectComposerpasses the previous pass’ buffer to our shader. - The vertex shader should not include the built-in uniform (
projectionMatrix,viewMatrix, …) or built-in attribute (position,uv, …) declarations at the top of the file. These can still be used, but they will be injected automatically by three.js.
Our custom shader pass can now be used like any 2D image shader. Let’s recreate the fun house noise effect we developed previously. Note that any custom uniforms used should be declared when creating the shader object.